
Summary of this article
This article describes the painting and assembly process of the original garage kit 'Minobe Shinobu', which is now available on BOOTH.
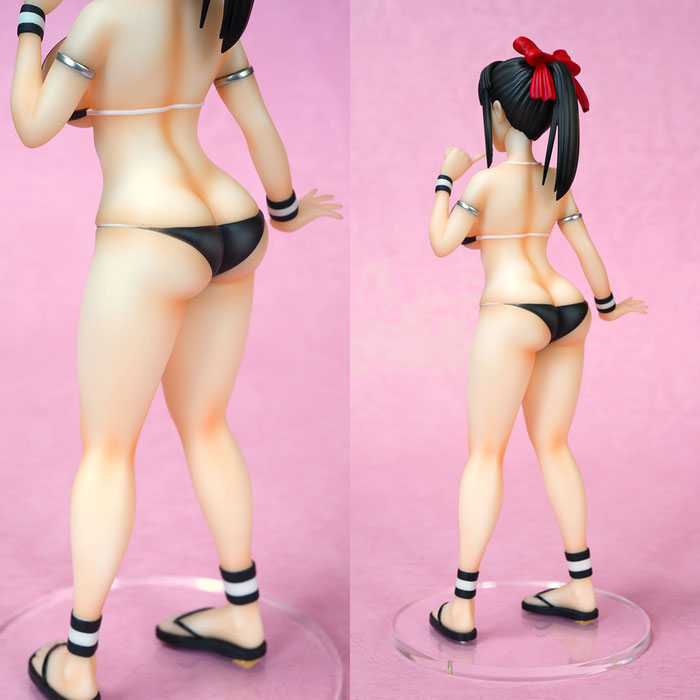
'Minobe Shinobu' is a 3D printed garage kit.
The construction process is almost identical to that of a standard resin cast kit, but this article is useful for those who are new to build garage kits or unfamiliar with 3D printed garage kits.

Table of Contents
- Test Fitting & Assembly
- Sanding
- Painting
Test Fitting & Assembly
Test fitting is a process to check the alignment and distortion of the parts, and to reinforce the parts with metal wire to prepare them for assembly.
The procedure is exactly the same for both 3D printed garage kits and traditional garage kits.
(1) Drilling

Each piece has a small mark on it, so drill a straight hole at the marked position with a 1.0 mm drill. Be careful not to break the drill blade.
(2) Pinning

After making holes in both parts, insert a 1.0mm brass wire into one of the holes and fix it with instant glue.
If you can't insert it properly, use nippers to insert it.
(3) Assembly

After inserting the brass wire, join the parts together and make sure they are perfectly fitted. If it doesn't fit well, bend the brass wire to adjust.
(4) Fix to miniature base

Drill holes in a acrylic base and the backs of the feet and secure with metal wire.
(5)Completed!

Test fitting is now complete. After painting, you can complete it by simply inserting the pins. If you want to increase the stability, use instant adhesives or Cyanon.
Sanding
Sanding is the process of sanding off the excess resin and smoothing the surface of the parts to make them suitable for painting.
The work and tools are almost the same as when building a traditional garage kit.
What is "support material"?

3D printer support material is like a scaffolding that is made during the 3D printing process, and is similar to runners in plastic models. "Minobe Shinobu" has been removed from the support material, but the parts have still a lot of pimple-like marks, so clean them up with sanding sponges.
What is "seam"?

Seam is a stratum-like pattern that is formed on the parts when they are 3D printed.
Digital light processing (DLP) 3D printers make parts by overlapping thin layers of resin (less than 0.05mm), so they have lines that resemble the cross-section of a mille-feuille. They are almost invisible to the naked eye, but when you touch them, they feel like the side of a dictionary, so if they bother you, sand them off or fill them with primer.
(1) Remove the marks of support material

When you touch the parts with your fingers, there are rough areas. Those are the marks of support material, so sand off them with #320 to #600 sanding sponges or sandpaper.
(2)Remove the seams

The seams are not noticeable, so you don't need to remove them if you feel it will take a lot of time. It is enough to sand them with #320 to #600 sanding sponges only the areas you are concerned about when you touch them. If you are a stickler for "I want to make the seams completely gone and make it smooth!", start with #240 and sand every corner of the parts.
For advanced builders!

Re-sculpting hair and swimming costume borders with a file can help to clean up the details.
This is an advanced technique that takes a lot of time and effort, so try it when you are used to building garage kits.
Painting
The painting procedure is exactly the same as for the traditional garage kit.
You can use an airbrush, a canned spray, or a brush to paint without any problems.
Before introducing the colour guide, I'm going to explain the similarities with resin kits and the unique characteristics of 3D printed garage kits.
Good adhesion of paint

As mentioned above, the adhesion of paint is very good and the paint will not peel off even if you scratch it with your fingernail, so there are very few accidents where the paint peels off when the masking tapes are removed.
Do not soak the parts in organic solvents for a long time.

When repainting, it is not advisable to soak the parts in organic solvents such as thinners or tool washes for a long time. Resin does not dissolve in solvents, so at first glance it looks harmless, but if solvents penetrate the inside of the part, cracks may suddenly appear one day.

When repainting, it is better to wipe off the paint with a melamine sponge that soaked in solvent to prevent the solvent from penetrating the parts as much as possible.
When you do eye-painting, if the seams are left on the surfaces, the parts will easily get dirty.

As I mentioned above, if you are going to do eye painting, it is best to remove the seams cleanly. When I do eye painting, I use a brush dipped in thinner to retouch the lines, but when I do this, the paint gets into the grooves of the seams and spreads the stains. When eye-painting, it works best if you remove the seams cleanly and protect the parts with gloss clear before working on it. This is not necessary if you will use decals.
Tools used
Nozzle diameter 0.3mm airbrush
I use it to paint primer and clear evenly.
Nozzle diameter 0.18mm airbrush
It is possible to spray paint narrower than 0.3 mm, which allows for delicate gradation painting.
This is a popular compressor set that is used by many modelers.
It is convenient to adjust the air pressure of the airbrush at hand.
【Paint thinner】
The dilution ratio is paint 1: thinner 2.5. This may increase or decrease depending on the condition of the paint.
【Matte Top Coat】
EX Flat Clear Premium + Flat Base Smooth
I use it to finish the parts after painting and decal application. The dilution ratio is the clear 1: thinner 4. Spray a thin layer on the parts 4-5 times and adjust to get the desired matte finish.
Color guide

[Skin tone]
Surfacerless Flesh Pink(80%)+Surfacerless Flesh Orange(20%)
or Clear Pink + Clear Orange
[Hair, swimsuit]
Base color: Neutral Gray
Shading color: Black (60%) + Clear (40%)
[Ribbon]
Base color: Bright Red
Shading color: Maroon
[Wristbands and flip flops]
Black
White
[Bracelet]
[Eyebrows and eyes]
Decals included in the kit
[cheeks]
Weathering Master H Peach
Highlight with Tamiya Enamel Flat White.
Use Weathering Master after matting the skin.
I have uploaded Youtube videos to help you paint.
These videos have English subtitles.
▼[Masking Tips] 1min 57sec
▼[Tips for Gradient Painting] 16 minutes 47 seconds
▼[How to build 3D printed garage kits] 22min 58sec


コメントをお書きください
MAMNOM (月曜日, 05 6月 2023 13:52)
Godsend. Thank you
Aslan (火曜日, 06 6月 2023 12:15)
You're welcome:)